Getting started with ESP
Zafron uses the Cayenne MQTT library to connect to the Zafron MQTT broker.
Requirements
- Arduino IDE
- ESP8266/ESP32 board
- Cayenne-MQTT-ESP 1.3.1
Tutorial
Overview
The diagram below illustrates the complete connection flow:
- Your ESP32 first connects to your WiFi network
- Once connected, it authenticates with Zafron's MQTT broker using your credentials
- After successful authentication, there are two main communication flows:
- Your ESP32 can send sensor data to Zafron's dashboard
- Zafron's dashboard can send commands to your ESP32
Step 1
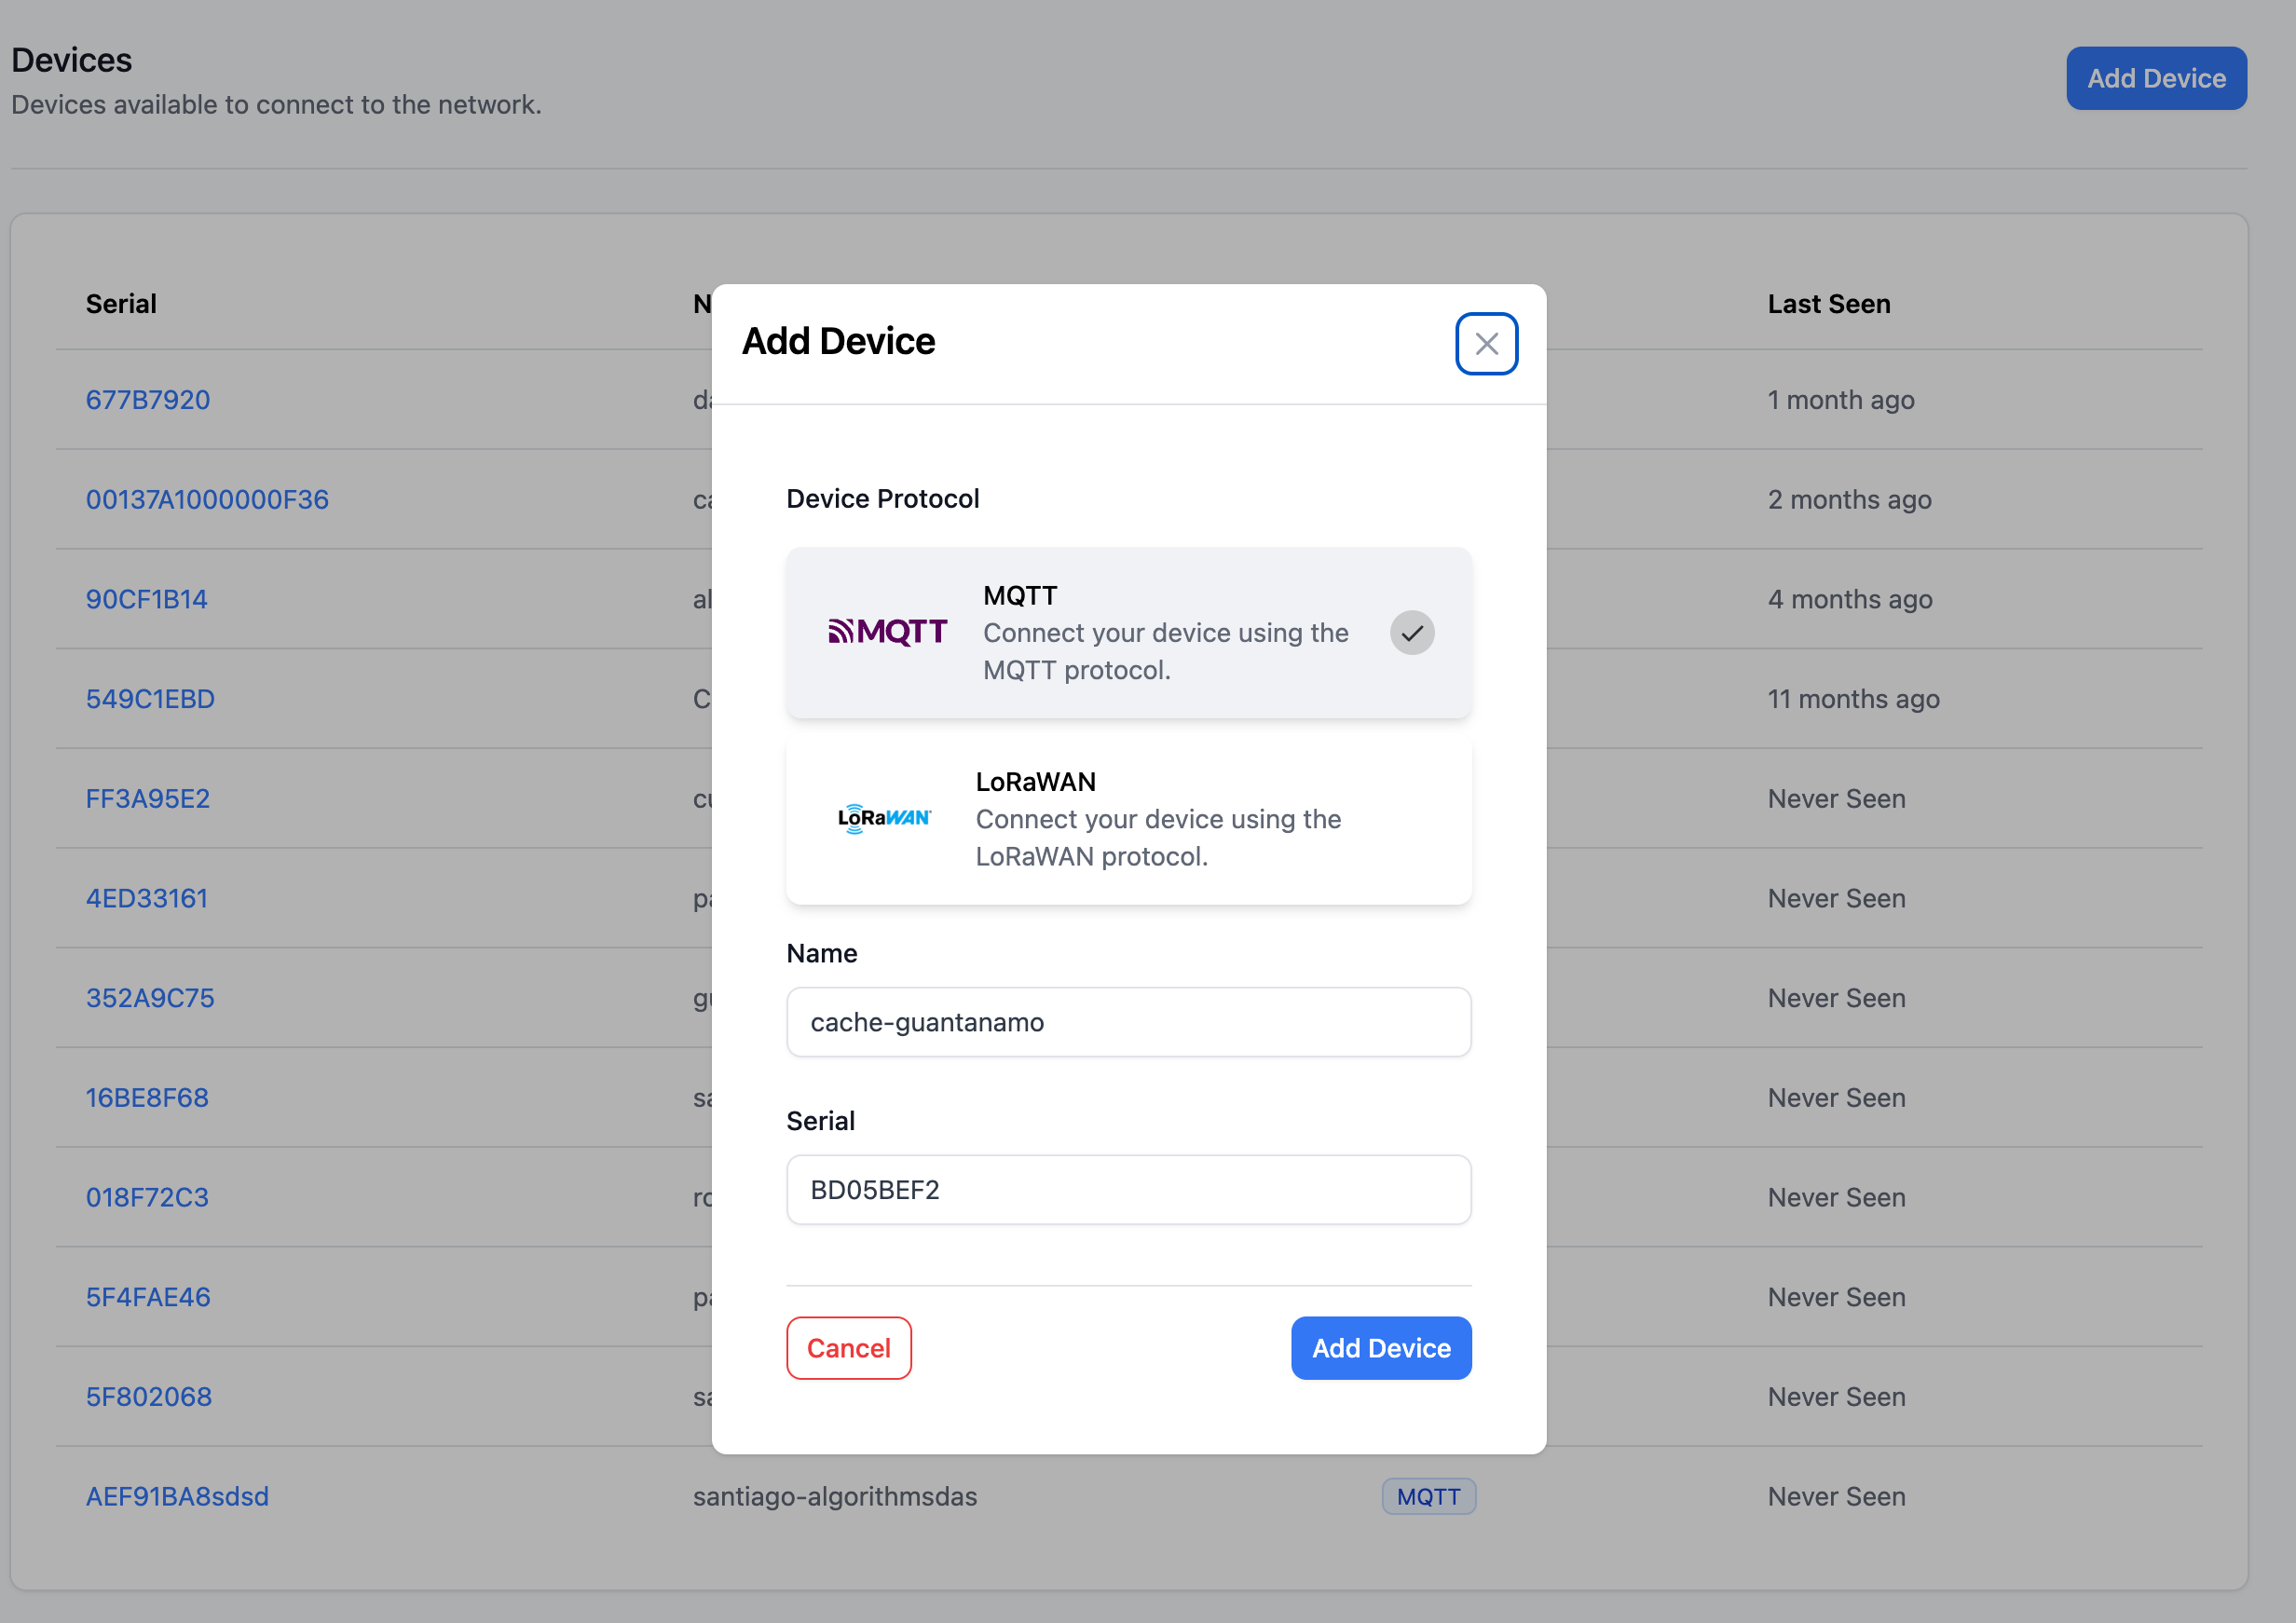
Login to Zafron and proceed with adding a new MQTT Device.
Step 2
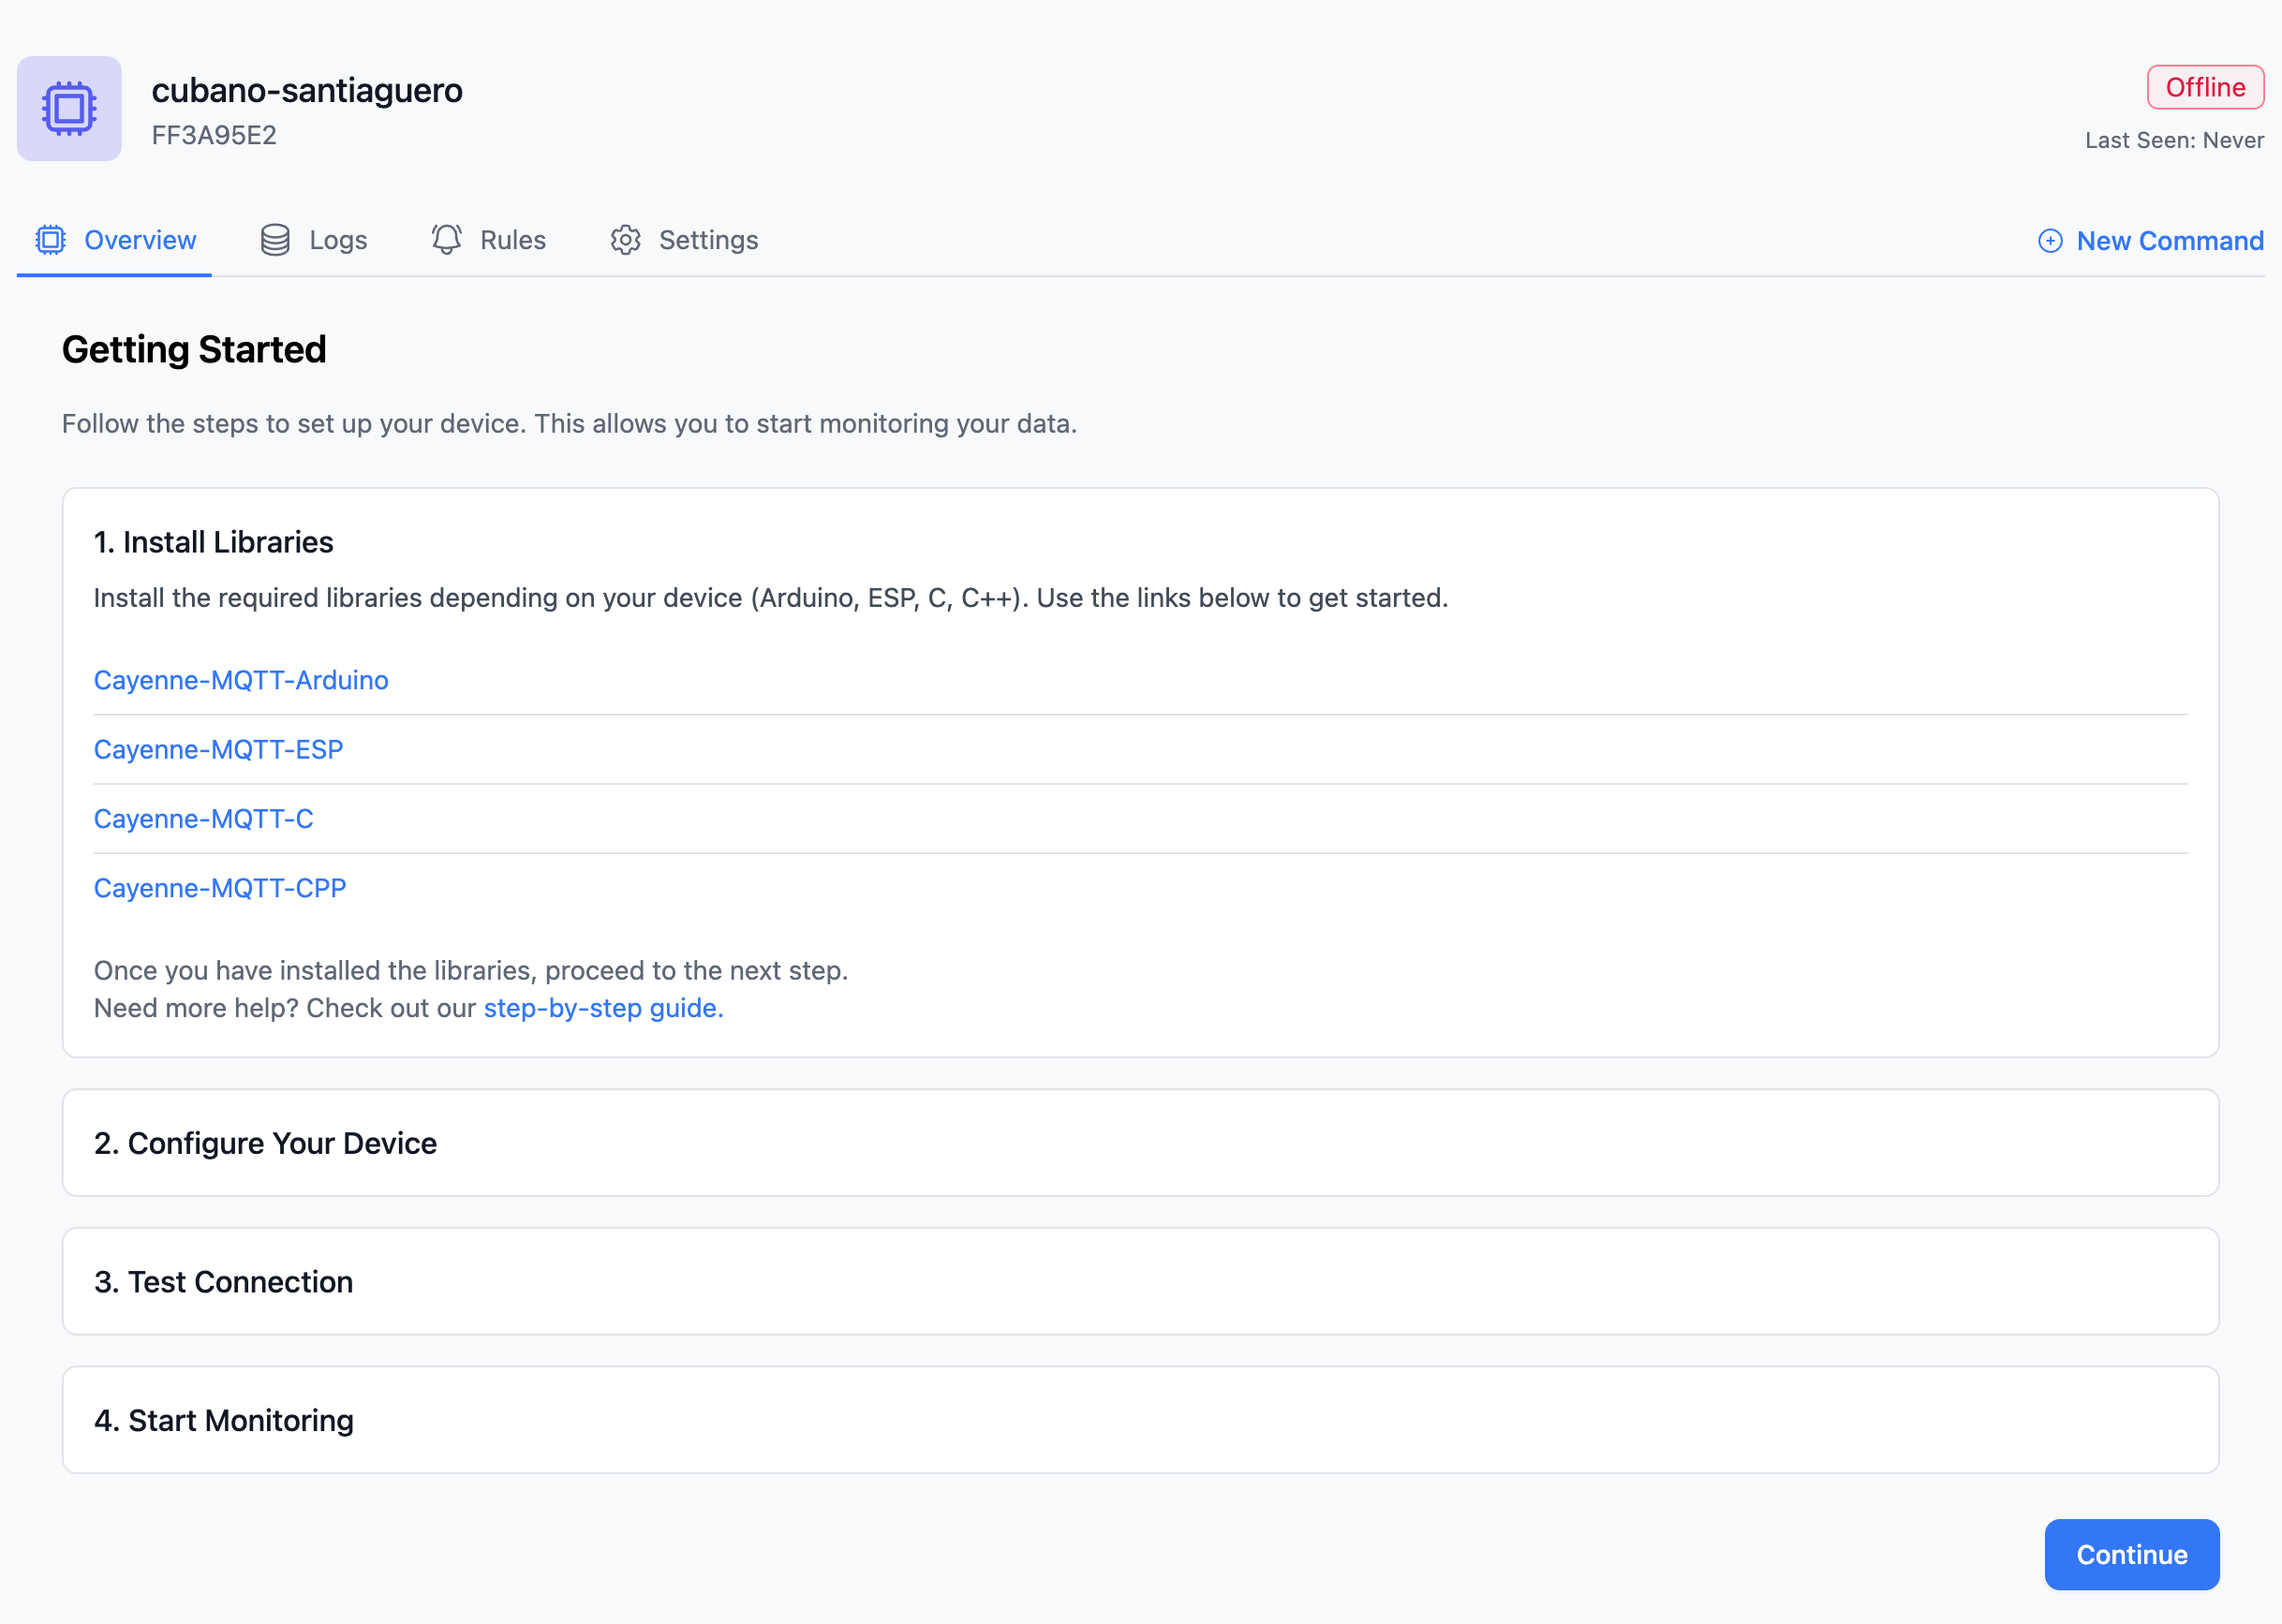
Download the ESP Client Library
Cayenne-MQTT-ESP Make sure to download the latest version 1.3.1
Step 3
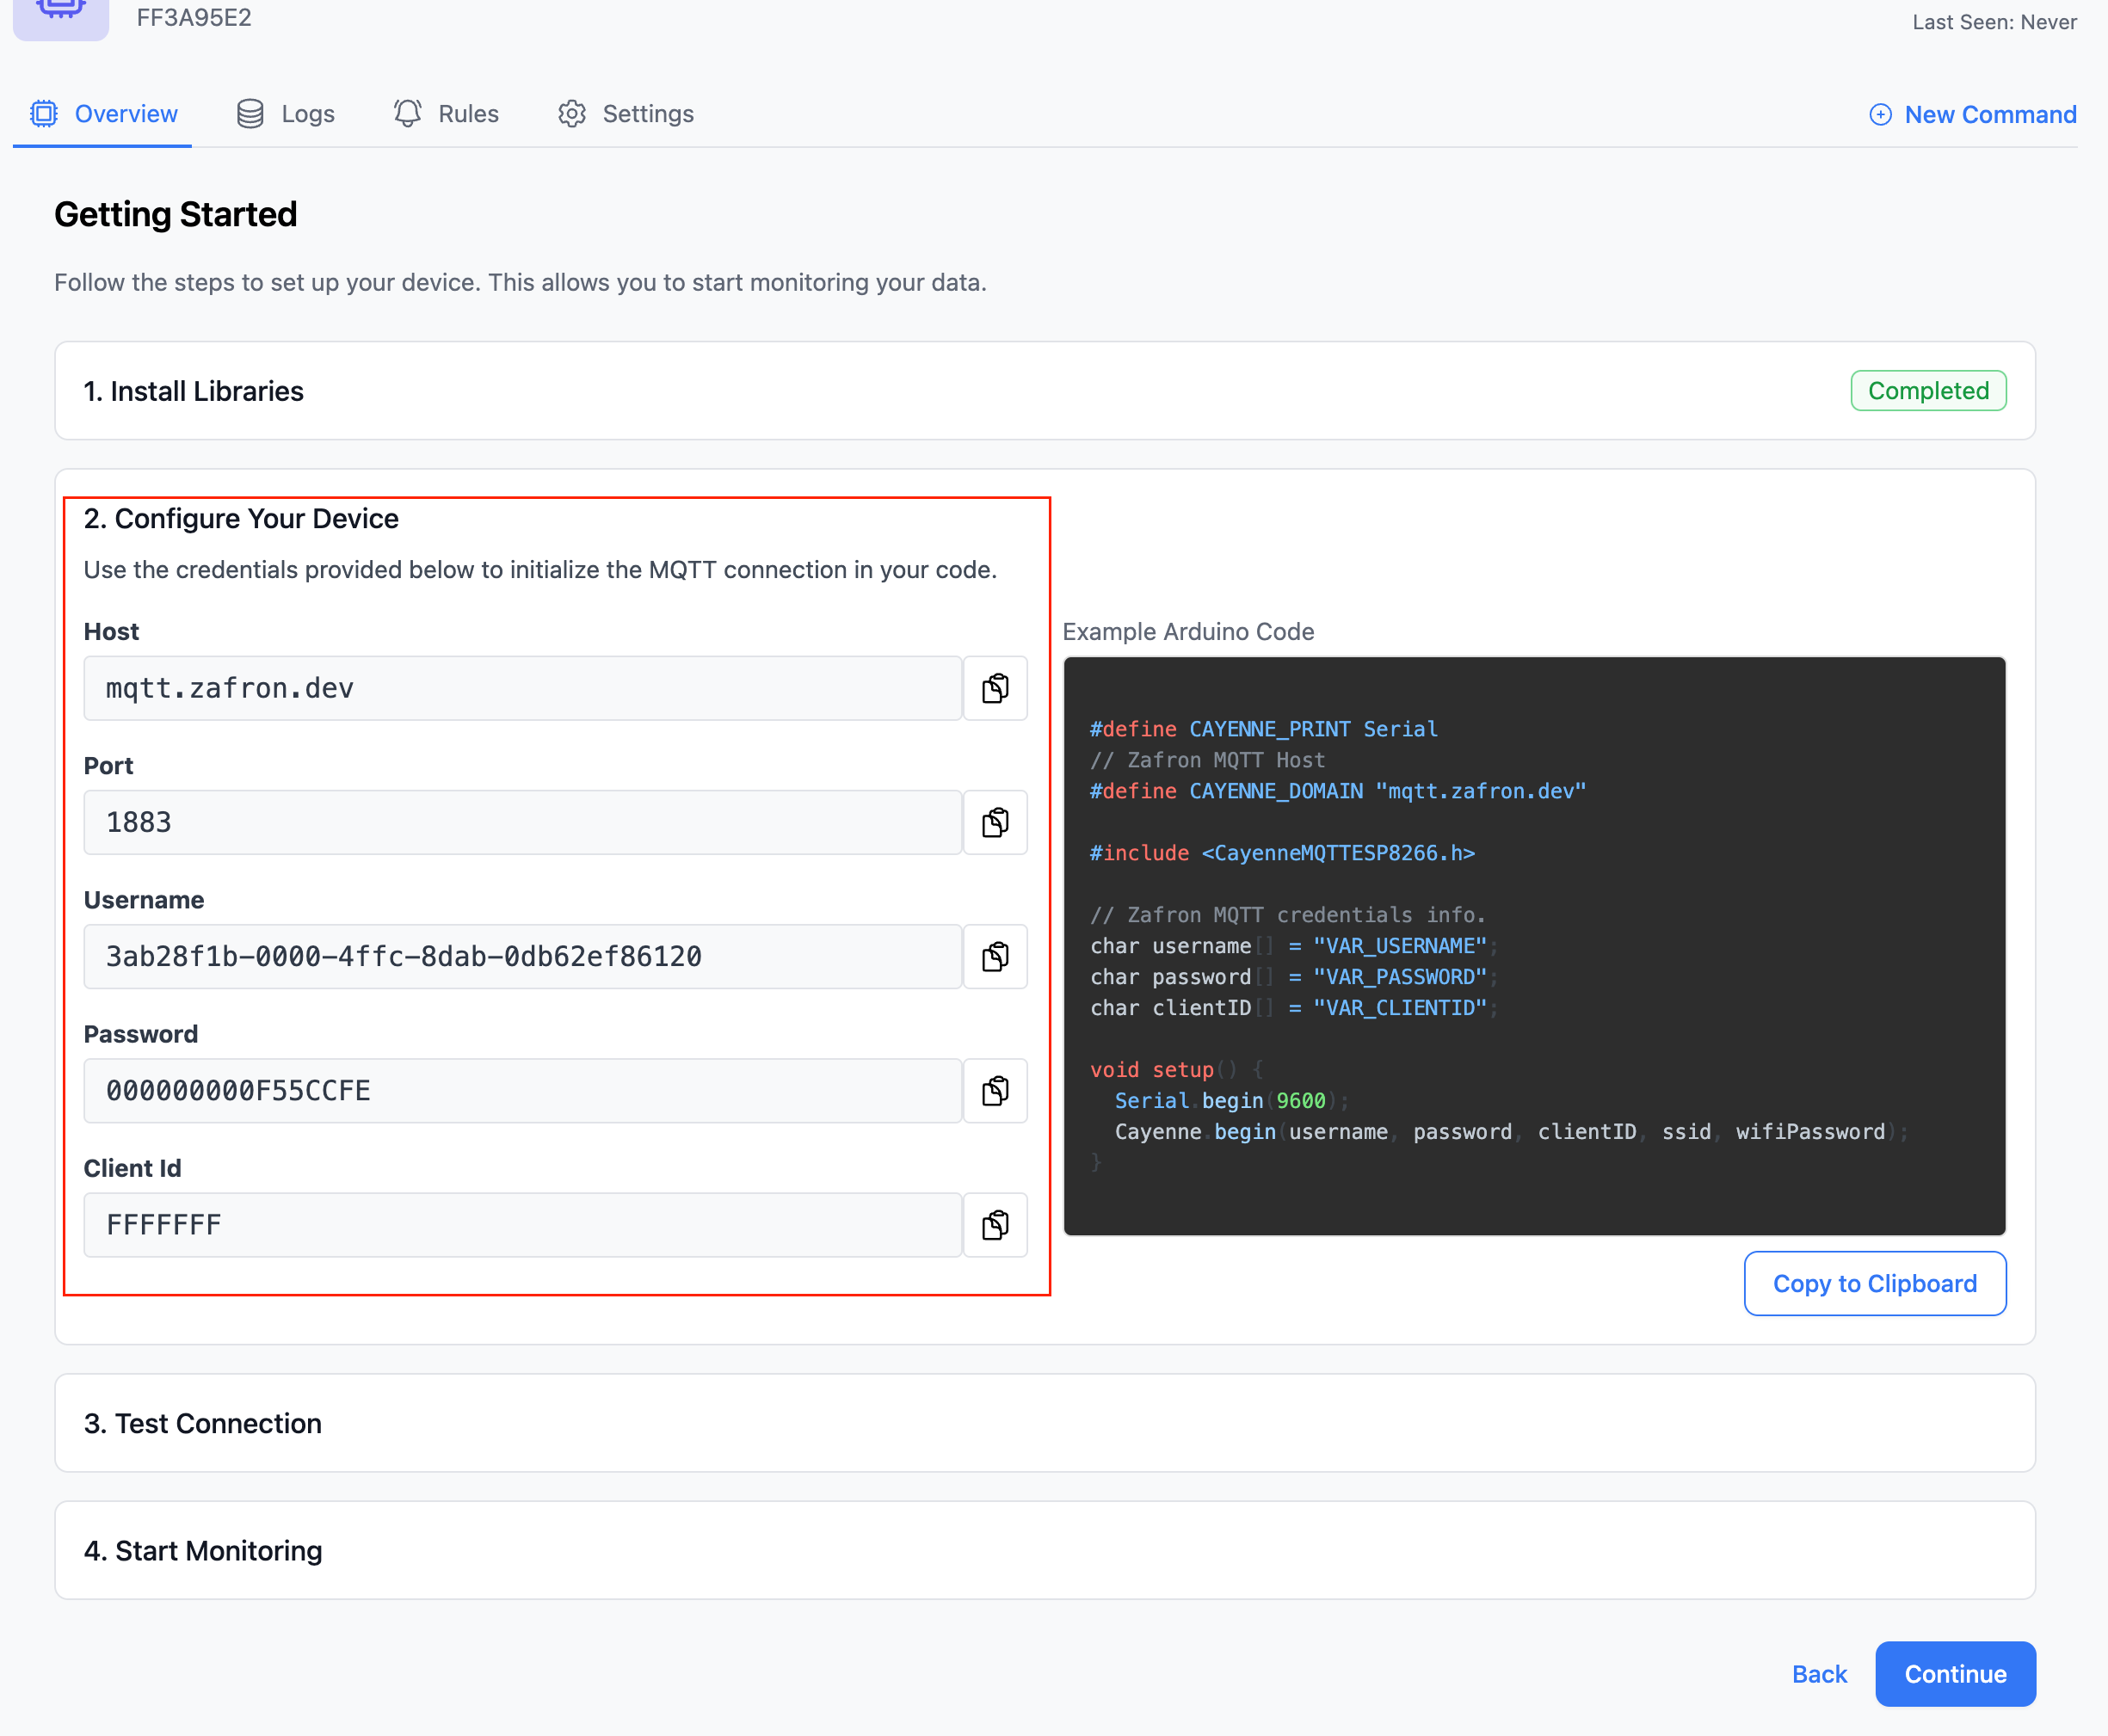
After adding your device in Zafron, you’ll need the MQTT credentials (username, password, clientID). You can find these in the “Getting Started” section of the Zafron dashboard.
Step 4
Use the example code below to flash your ESP board. Remember to replace the MQTT credentials with the ones you copied in Step 3.
ESP Example Code
#define CAYENNE_PRINT Serial

// Redefine the domain BEFORE including the library.
#define CAYENNE_DOMAIN "mqtt.zafron.dev"

#include <CayenneMQTTESP8266.h>  // For ESP8266, use CayenneMQTTESP32 for ESP32

// Zafron authentication info.
char username[] = "USERNAME";
char password[] = "PASSWORD";
char clientID[] = "SERIAL";

void setup() {
	Serial.begin(115200);  // Use 115200 baud rate for ESP devices
	Cayenne.begin(username, password, clientID, ssid, wifiPassword);
}

void loop() {
	Cayenne.loop();
}

// Default function for sending sensor data at intervals to Zafron.
CAYENNE_OUT_DEFAULT()
{
	// Write data to Zafron here. This example sends the current uptime in milliseconds on virtual channel 0.
	Cayenne.virtualWrite(0, millis());
	// Example of sending temperature data to channel 1.
	Cayenne.celsiusWrite(1, 22.0);
	// Sending light level data.
	Cayenne.luxWrite(2, 700);
	// Sending proximity data.
	Cayenne.virtualWrite(3, 50, TYPE_PROXIMITY, UNIT_CENTIMETER);
}

// Default function for processing actuator commands from the Zafron Dashboard.
CAYENNE_IN_DEFAULT()
{
	CAYENNE_LOG("Channel %u, value %s", request.channel, getValue.asString());
	// Process the received command here.
}
Step 5
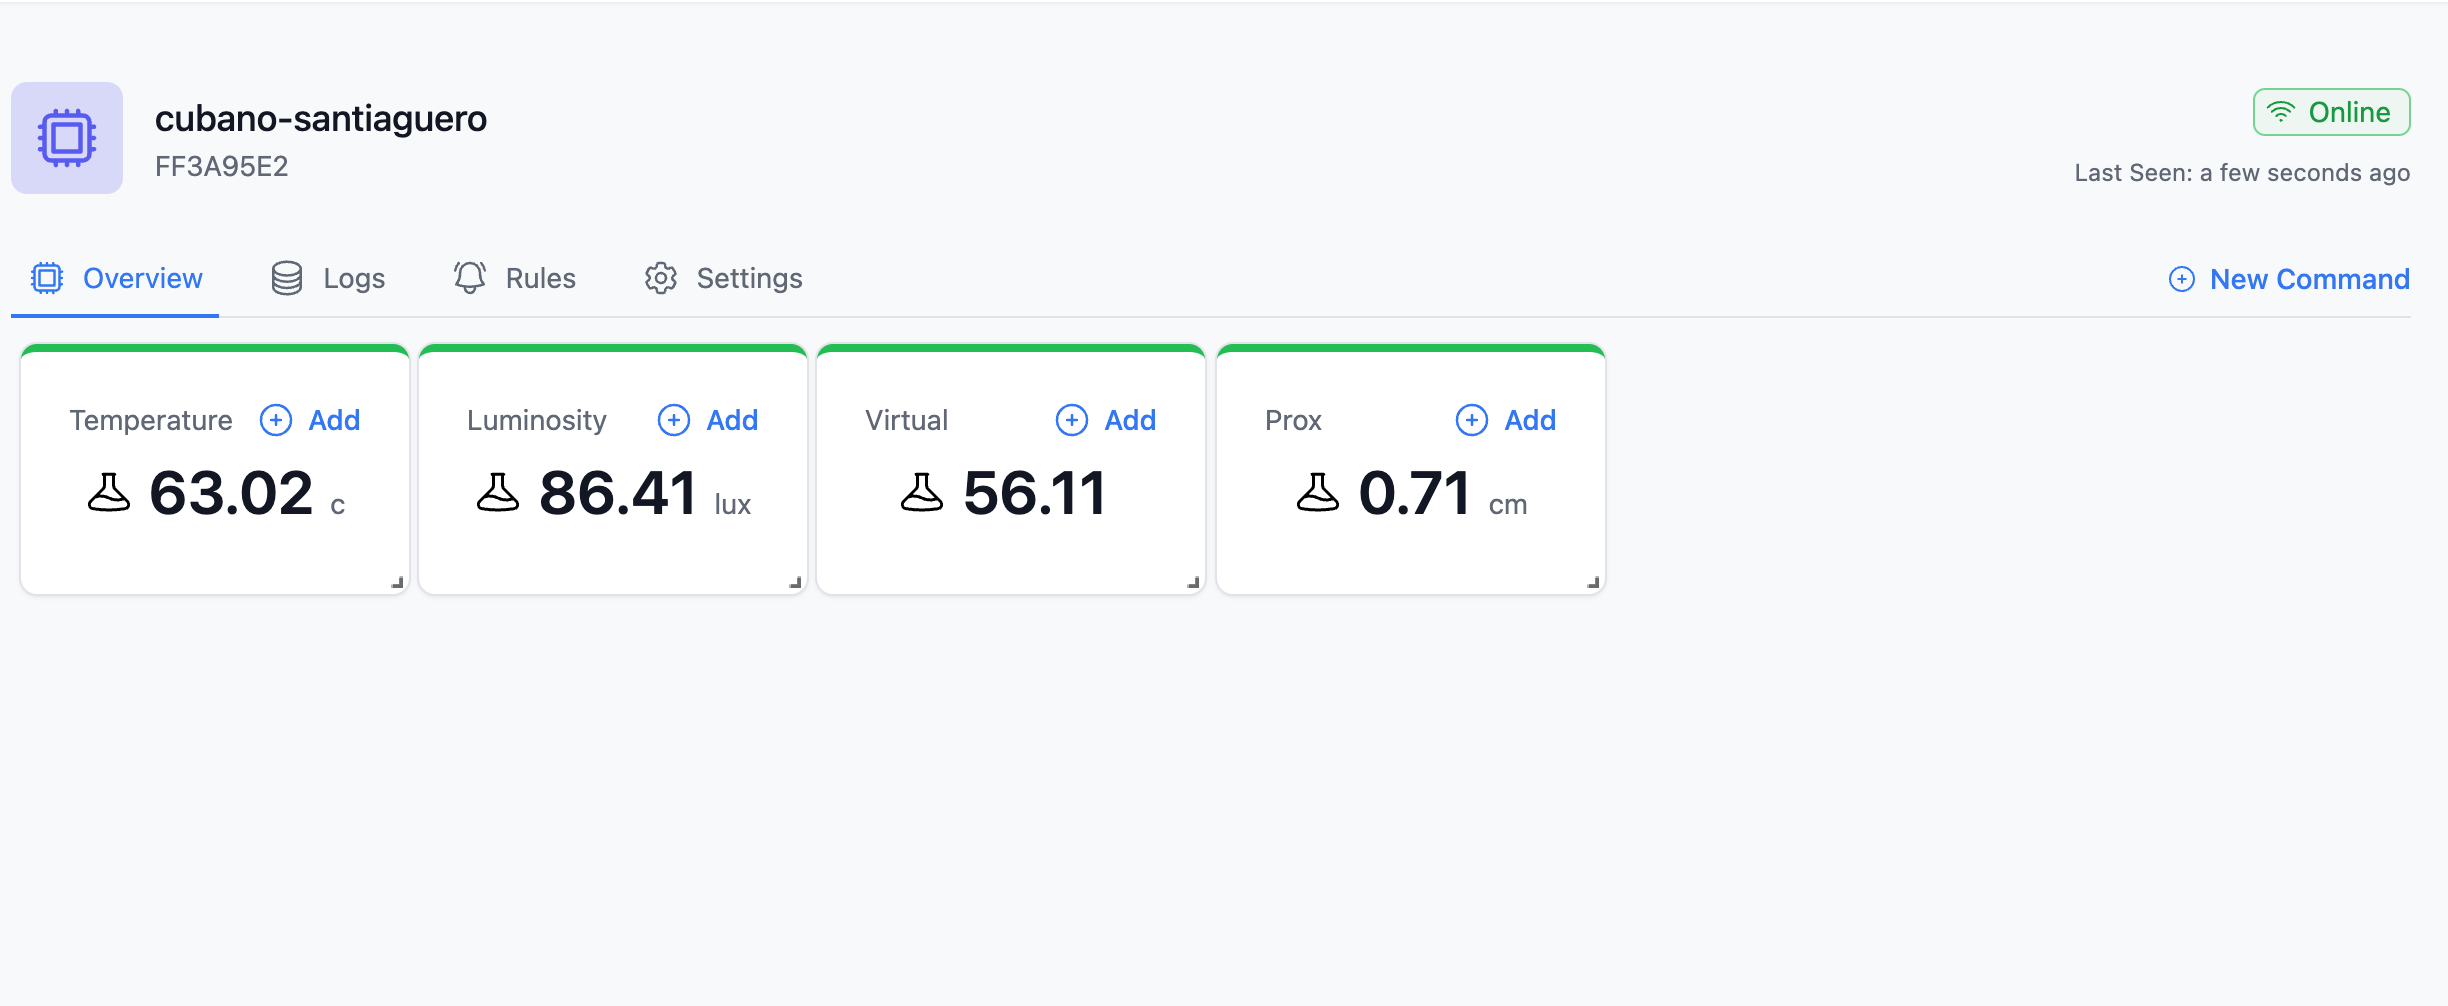
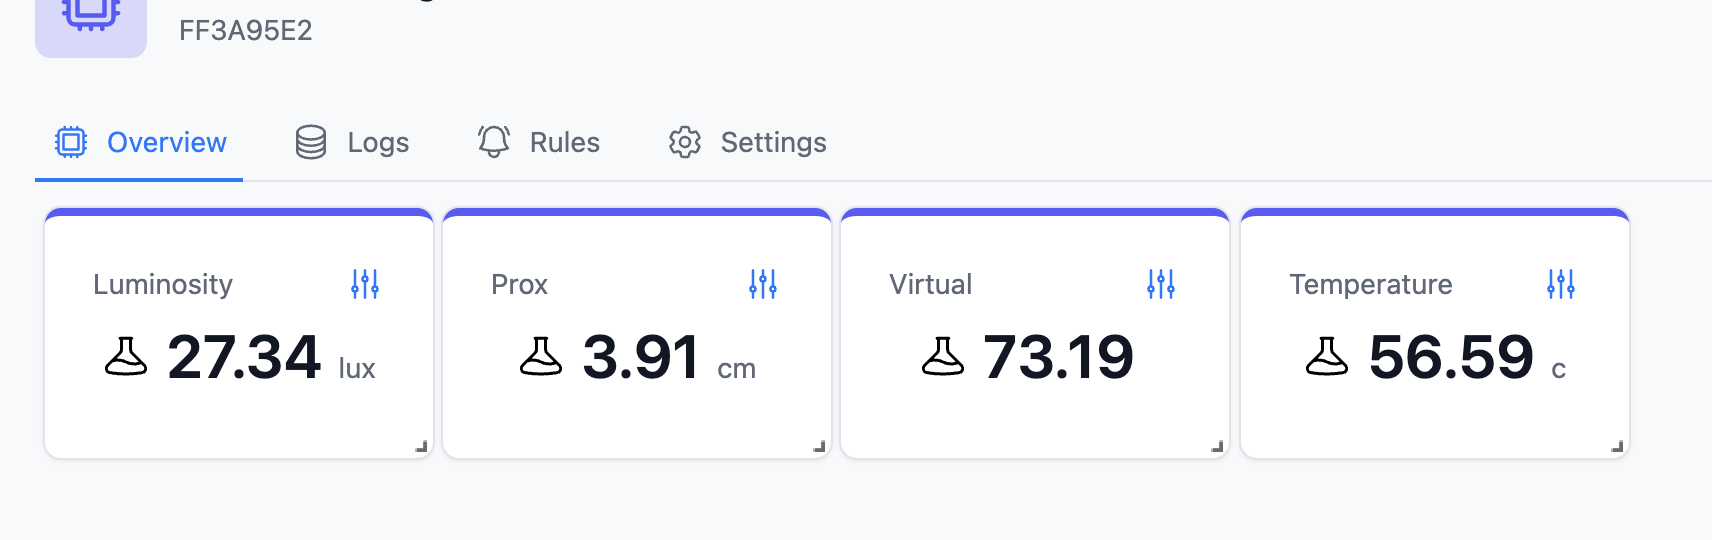
Once your ESP board is connected, the Zafron dashboard will display it as online, and widgets will begin to show data from your device.
Step 6
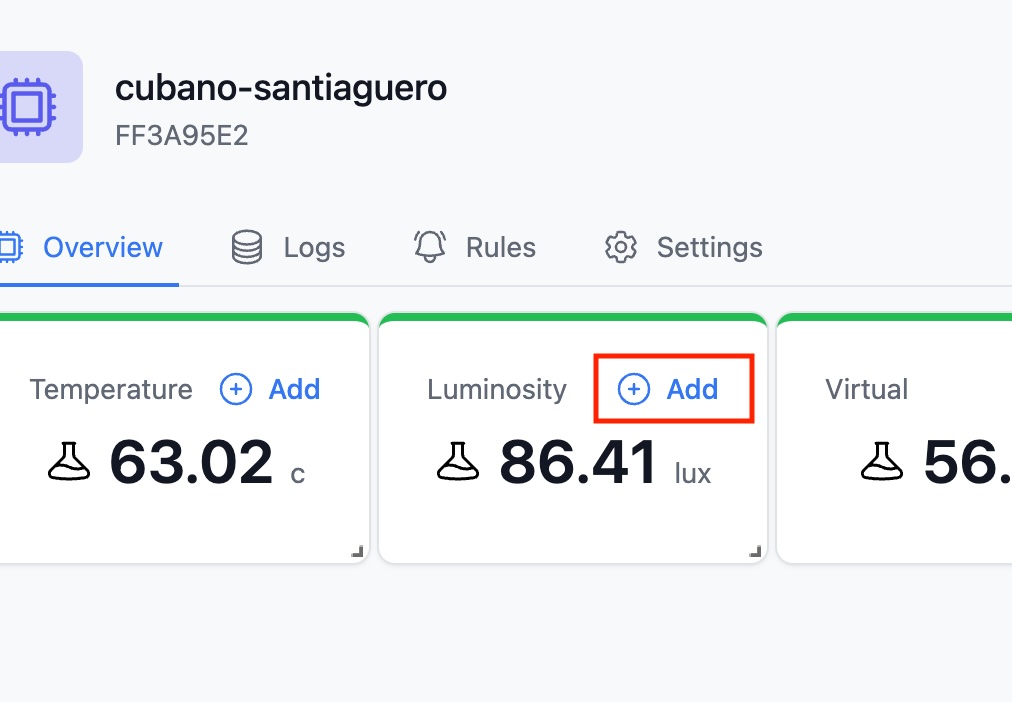
Click the +Add button on the dashboard to preserve the widget showing your data.
Pending State Widgets
Active Widgets
Step 7
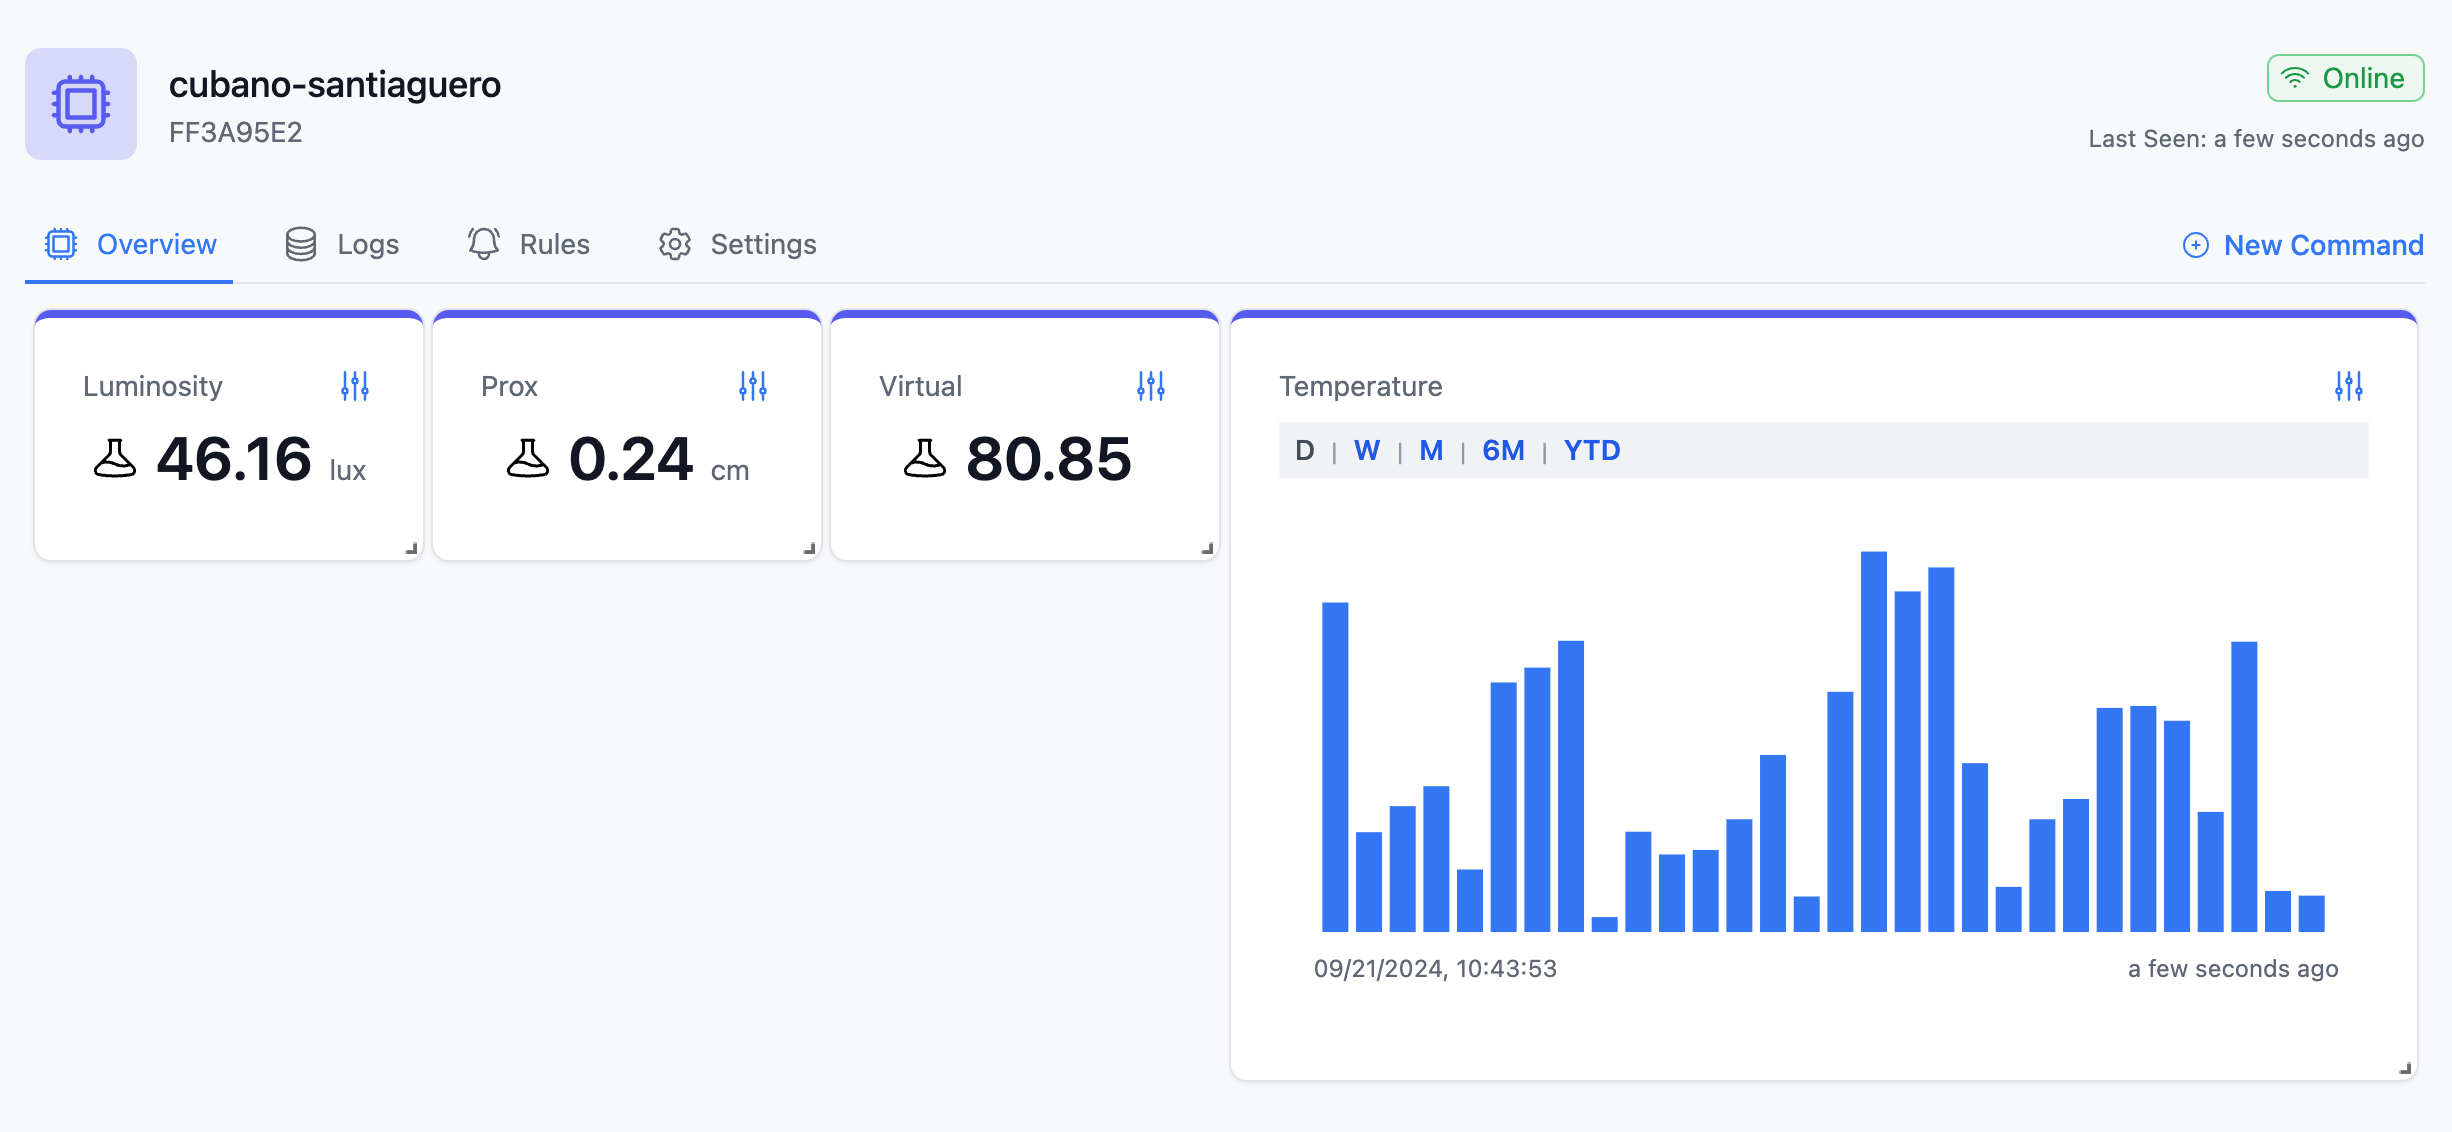
You can change the widget type (e.g., bar charts, graphs) to better visualize your data.
Conclusion
You have now connected your ESP device to Zafron and set up basic data monitoring. Feel free to explore other features like device logs and automation rules!